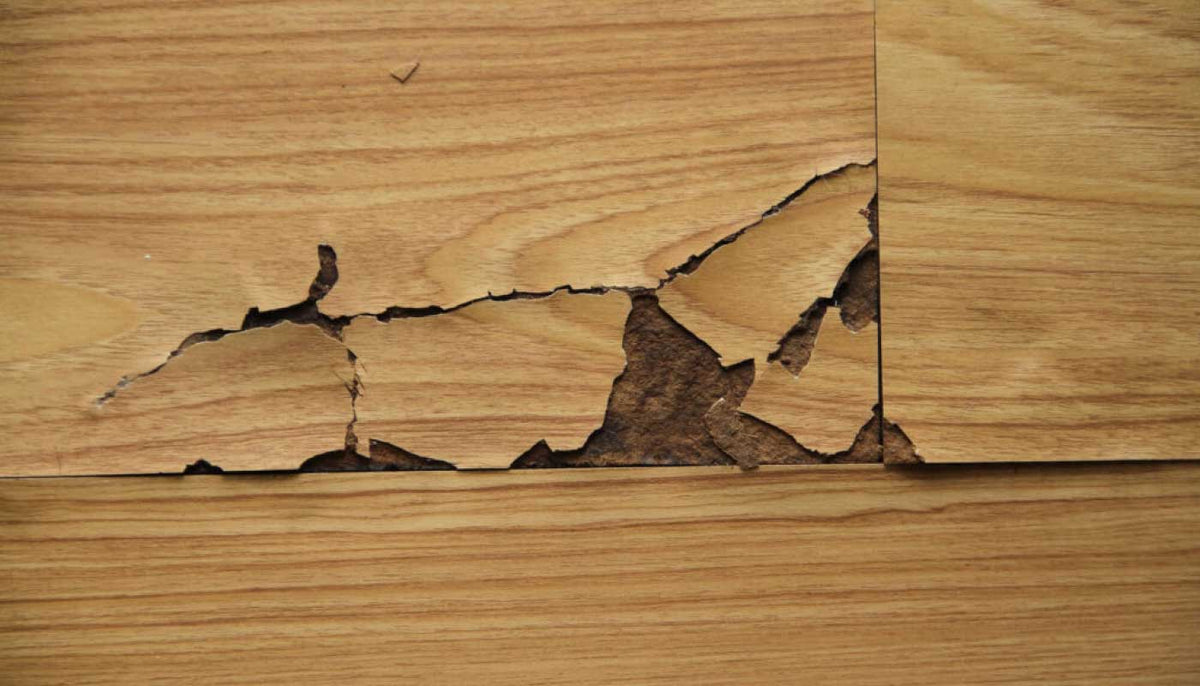
Repairing a Damaged Laminate Floor
|
|
Time to read 5 min
|
|
Time to read 5 min
Laminate is one of the strongest, most durable flooring options for any space in your home. From the kitchen to the living room, den or powder room, laminate can stand up to day-to-day wear and tear with ease. Laminate even gets used in commercial spaces for that reason.
Over time though, even tough laminate can start to look a little worse for wear. In some cases, this is due to difficult conditions like a high-moisture area, exposure to heat or improper installation. The good news is that a fix is almost always possible. Use this guide to learn more about how to repair a damaged laminate floor.
Laminate flooring is known to be durable enough for even the most heavily-trafficked residential and commercial spaces. Scratches and finish damage can still occur even if your laminate flooring material has a very high abrasion class rating. After all, there’s only so much abuse even the toughest materials can handle.
In most cases, scratches, scuffs and finish damage can be repaired with relative ease. A simple laminate floor repair kit, which you can obtain online or in many hardware stores, is pretty much all you’ll need. Here’s how to use one effectively:
Apply varnish over the repaired area if instructed by the kit. Finish with fine grit sandpaper once the varnish has dried if instructed by the manufacturer.
Laminate flooring is made to last, and one of the main benefits of using it in your kitchen or bathroom is the fact that it’s resistant to water. That doesn’t mean it’s waterproof though. If water is left to sit on your laminate floors or damage from a leaking pipe beneath your laminate planks occurs you’re likely looking at replacing at least a section of your floors. The good news is that replacing a part of your damaged laminate floor shouldn’t be an overwhelming procedure. Here’s a step-by-step guide to help you fix your floors after water damage has occurred: Locate the wall nearest the damaged plank or planks. Remove the molding here. This will give you access to any planks leading to the damaged area. Work your way to the damaged plank. You can do this by disassembling the locking system on planks that connect to the damaged area. You’ll know the planks are unlocked when you remove the tongue of one plank from the groove of the adjoining plank. Repeat step two until you’ve reached the damaged plank. This could mean removing multiple planks to get to the damaged area depending on your space. Pull the damaged plank and replace it with a new one. Make sure that it is locked in place before re-assembling your flooring, locking each plank in place as your work your way back toward the wall. Finish by replacing the molding you had to remove to fix your damaged laminate floor. Pro Tip: Reaching a damaged plank that’s in the center of a large room can be time consuming. While it is possible to drill out a damaged plank without removing others around it, this procedure is best left to a trained professional since it requires experience and special skills to perform properly. Trying this procedure on your own could damage multiple surrounding planks, leaving you with a costly repair job. Buckling, lifting laminate floors can be confusing for the average homeowner. While laminate is very strong, there are a number of reasons it can buckle or lift over time. Water damage, a lack of acclimation before installation and an expansion gap that’s too small or non-existent are common culprits. High temperatures may also be to blame. Use these steps to help you assess and repair buckling and lifting laminate floors. Figure out why your laminate floors got damaged in the first place. Problems like water damage and high heat should be addressed and fixed. If a poor expansion gap is the problem you’ll want to avoid making the same mistake when installing new laminate. Remove the molding or moldings near the damaged laminate. You’ll need to do this to access and remove the planks. Carefully uninstall the laminate that leads from the wall and molding to the problem area. If these planks are in good shape they can be re-used later if you don’t damage the locking system. Remove damaged planks and replace them with new ones. Lock your new planks and continue working backward toward the molding and wall. Be careful to leave an appropriate expansion gap near the wall. Replace the molding to finish the job. Apply any touch up paint needed if the molding was damaged during your repair. Pro Tip: Order and keep extra laminate flooring handy so you can quickly replace damaged planks. By ordering more now you can ensure that your replacement laminate planks will match perfectly with your older ones. Repairing a damaged laminate floor doesn’t have to be a huge job that requires professionals. For small tasks like replacing a plank, you’ll likely be able to do the work yourself in an afternoon. Bigger jobs may require more time and patience, but with a little fortitude, you’ll realize that laminate is an ideal material to be working with. Want to go for an upgrade instead of replacing old, damaged laminate? We can help you get ready to update your floors with brand new laminate in a range of looks to fit traditional, transitional and modern homes. Easy to install and ultra-durable, laminate flooring is an excellent choice for practically every room in your home. Contact our trained professional representatives to learn more about adding new laminate to your home or getting essential replacement materials for repairs. Repairing a Water Damaged Laminate Floor
Step 1:
Step 2:
Step 3:
Step 4:
Step 5:
Tackle Buckling and Lifting Laminate Floors
Step 1:
Step 2:
Step 3:
Step 4:
Step 5: